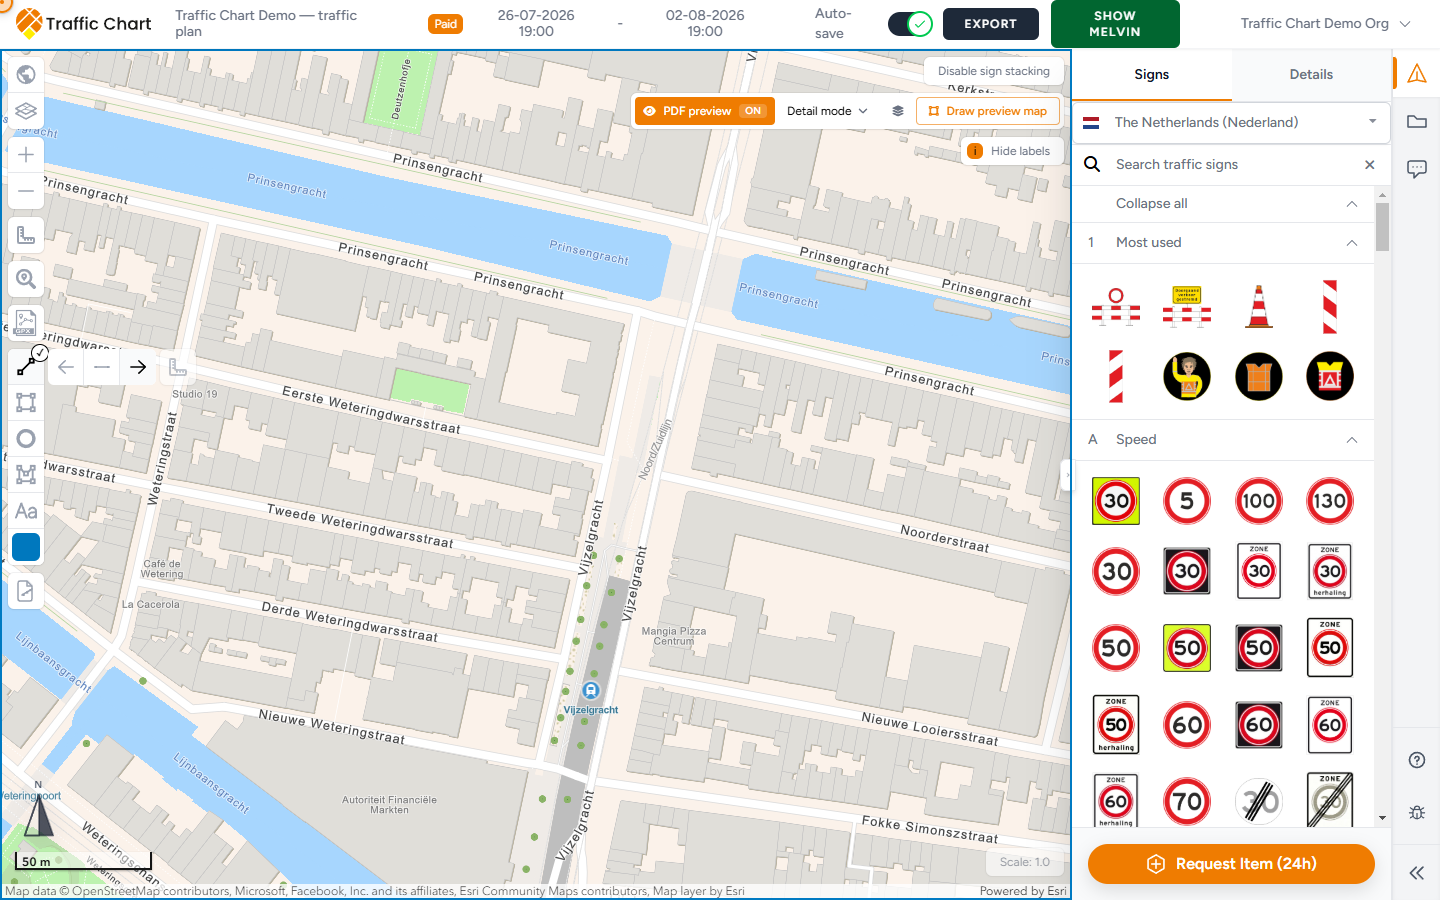
*motion — street zoom measure away from route, hold labels, clear*
Besides traffic signs, you sketch on the map, import a track, measure, and set overall drawing **Scale:**. These tools support detours, work areas, and notes. Sketches only appear on a PDF when they sit inside an export map. A line drawn outside the **Detail** or **XL** rectangle will not print.
Use this when you need lines, zones, GPX, or a distance check. Skip it for sign catalogues or Melvin.
You must be able to edit. Sketch tools are hidden when the plan is **Plan is read-only**, **Plan is under review**, or **Plan is approved and locked**.
## Sketch tools
On the left of the editor (edit mode, not read-only), under **Search address**:
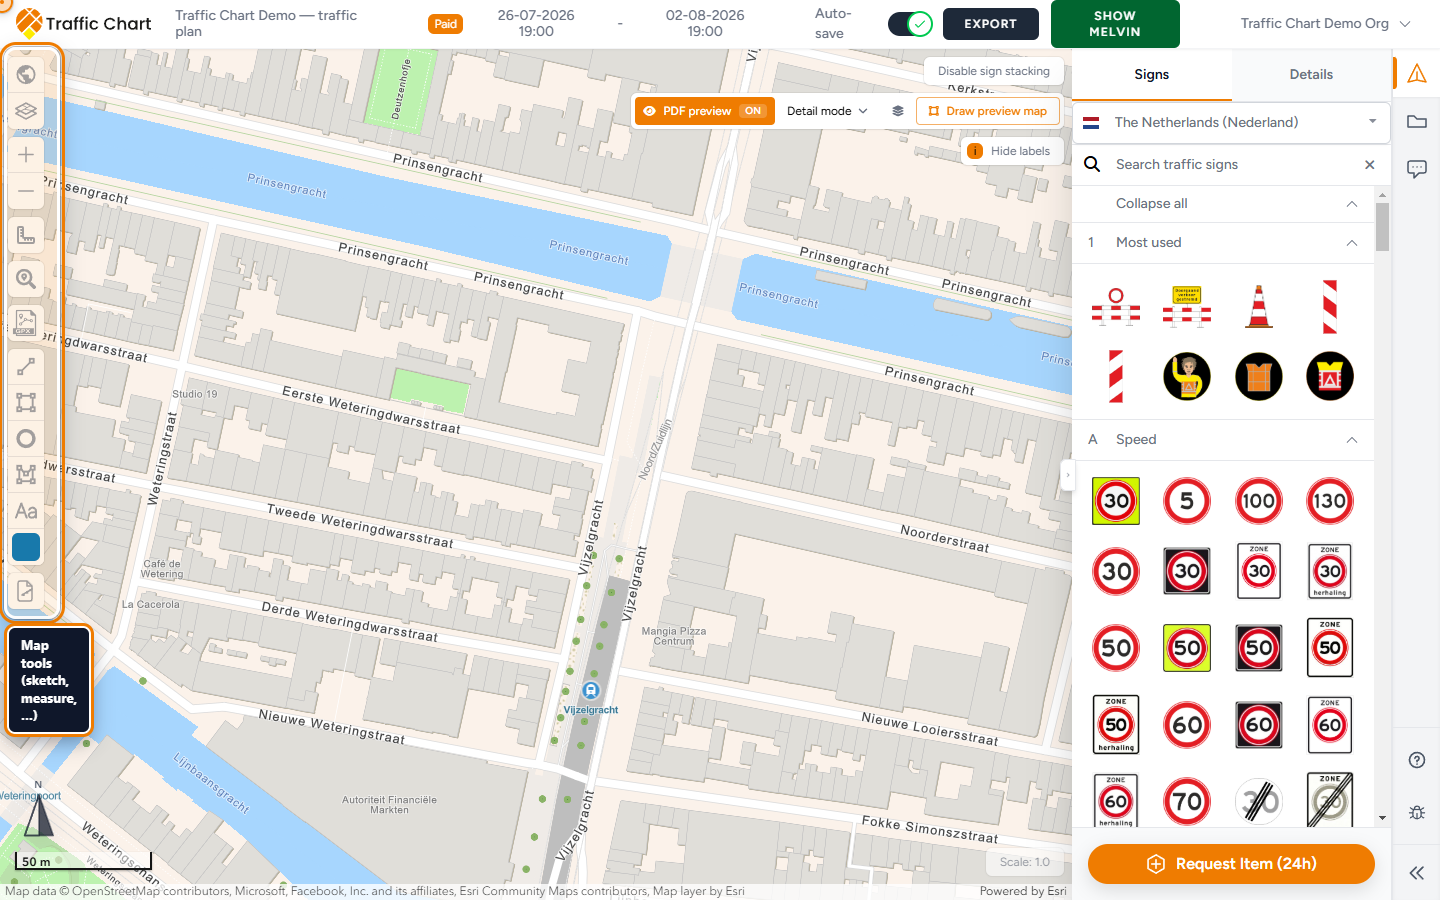
| Tool | Use |
|------|-----|
| **Import GPX** | Load a `.gpx` file from your computer |
| **Add line** | Routes and boundaries. Extra buttons set arrow direction on the line |
| **Add rectangle** | Rectangular zones |
| **Add circle** | Circular zones |
| **Add shape** | Freeform polygons |
| **Add text** | Notes on the map |
| **Select color** | Palette for new sketches. Tooltip: **Select drawing color** |
Click points to draw. Finish the line or shape as the map guides (double-click to end a line). Draw inside the area you will later frame with an export map if the sketch must print.
### Add line and direction extras
Click **Add line**. While it is active (or after you select a line), three extra buttons appear to the right of the tool:
- Left arrow — the line points backwards
- Plain horizontal line — no arrow
- Right arrow — the line points forwards
Pick a direction *before* or *while* you draw. A detour usually wants one arrow. A work-area outline usually wants the plain line.
A ruler button next to those extras is **Toggle measurement**. It shows or hides that line’s own length on the map. The same **Toggle measurement** control appears for a selected **Add rectangle**, **Add circle**, or **Add shape**.
### Add rectangle, Add circle, Add shape, Add text
**Add rectangle** — click two corners. Use it for a work compound or a closed street block.
**Add circle** — click the centre, then the radius. Use it for a buffer around a junction.
**Add shape** — click a freeform polygon; close it as the map guides. Use it for an irregular site.
**Add text** — click the map, then type. This is a map note, not a traffic-sign **Label**, and not a review **Comments** pin. Sign labels live on the stack. Review remarks live in **Comments**.
Click the same tool again to stop drawing.
## Drawing colours
1. Open the sketch stack and click **Select color** (tooltip **Select drawing color**).
2. Pick a named colour. Hovering a swatch reads **Select Red color** (or whichever name the palette prints). The selected swatch tooltip is **Selected color Red. Toggle color menu.**
3. Draw the next line, shape, or text.
4. Change colour again for the following object.
Use a consistent colour for emergency versus public routes. Names come from the product colour list. Colour applies to *new* sketches; change the tool colour before you draw the next object.
## Import a GPX route
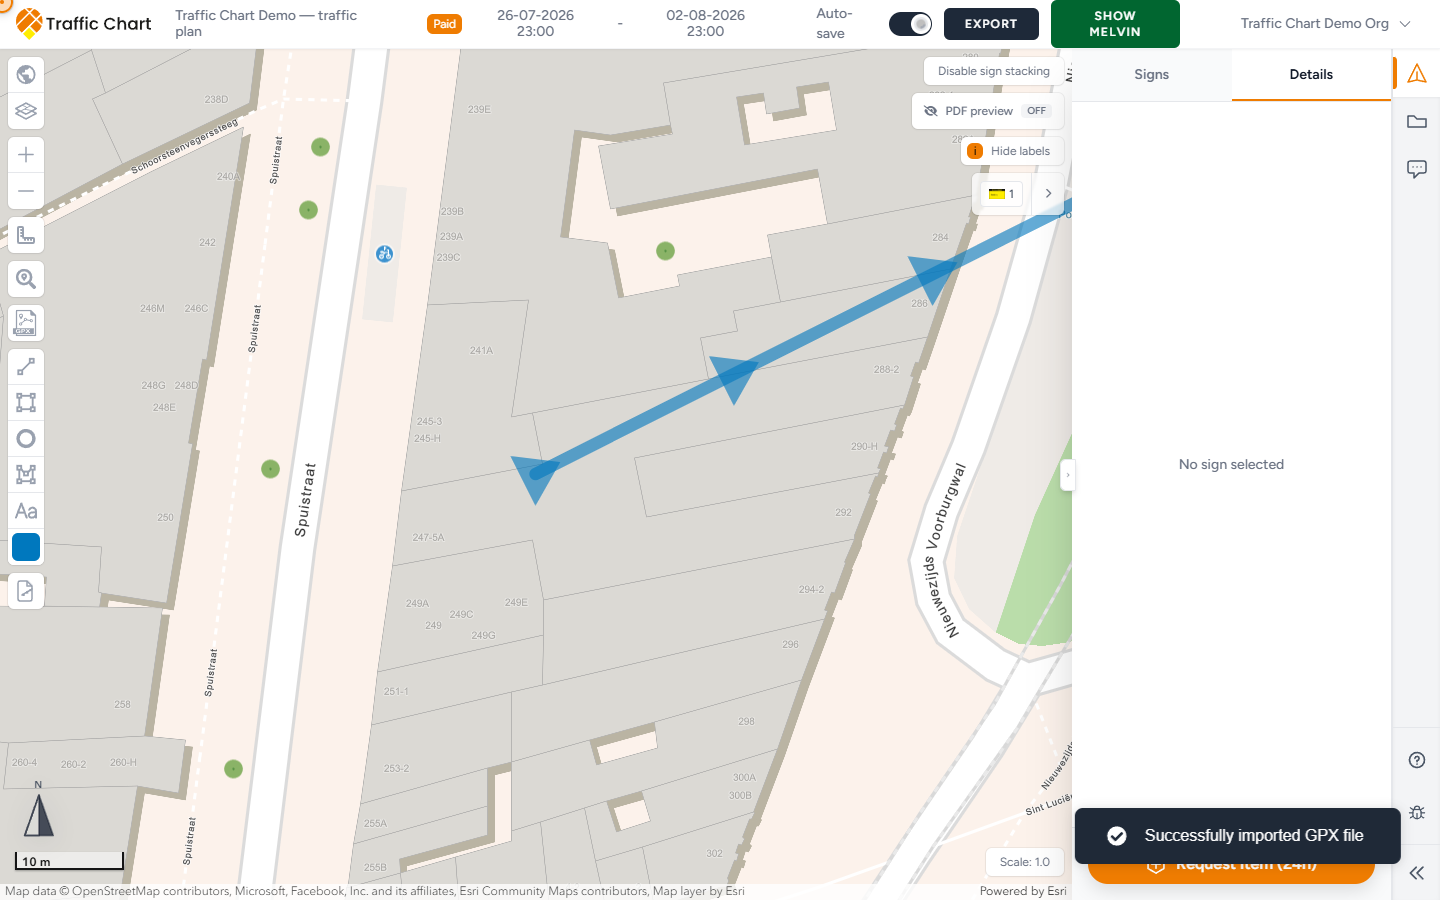
1. Click **Import GPX**.
2. Choose a `.gpx` file from your computer.
3. Wait for **Successfully imported GPX file**, or **Failed to import GPX file**.
4. Find the route under **Layers & Objects** → **GPX Imports**. The row is **GPX Route**.
5. Save the plan (**Auto-save** or **Save**). Success toast: **Saved traffic plan**.
Use GPX for recorded detours, bike routes, or site perimeters. If import fails, try a simpler single-track file, or draw **Add line** instead. A failed import does not change the plan.
## Layers & Objects for sketches
Open **Layers & Objects** on the left (above the sketch stack). Groups you will use here:
| Group | What it lists |
|-------|----------------|
| **Lines & Shapes** | Lines, rectangles, circles, polygons |
| **Text Areas** | **Add text** notes |
| **GPX Imports** | Imported tracks (**GPX Route**) |
**Traffic Signs** and **Bulk Placement** live in the same panel; they are not sketches.
On a layer: **Lock layer** / **Unlock layer**. On a row: **Lock object** / **Unlock object**, and **Zoom to object**. Empty panel: **No objects found**. A locked object will not move until you **Unlock object**. Clicking a locked drawing can toast **This layer is locked**.
Use **Zoom to object** when a GPX track or a small text note is hard to find after you pan away.
## Measurement tool
Measurements check distance and area on screen. They are not a permanent drawing. Zones that must export belong as **Add rectangle**, **Add circle**, or **Add shape**.
1. Open **Measurement tool**.
2. Choose **Measure line** or **Measure area**.
3. Click points on the map.
4. Read **Total** on the measurement.
5. **Clear measurement** when finished.
Zoom in for precise clicks at junctions. **Measure line** is a path; **Measure area** is a closed polygon. Neither appears on the PDF.
Drawn shapes can show their own size. After you select a line or shape, the ruler control is **Toggle measurement**. That *does* belong to the object. Still: only geometry inside an export map prints.
## Scale
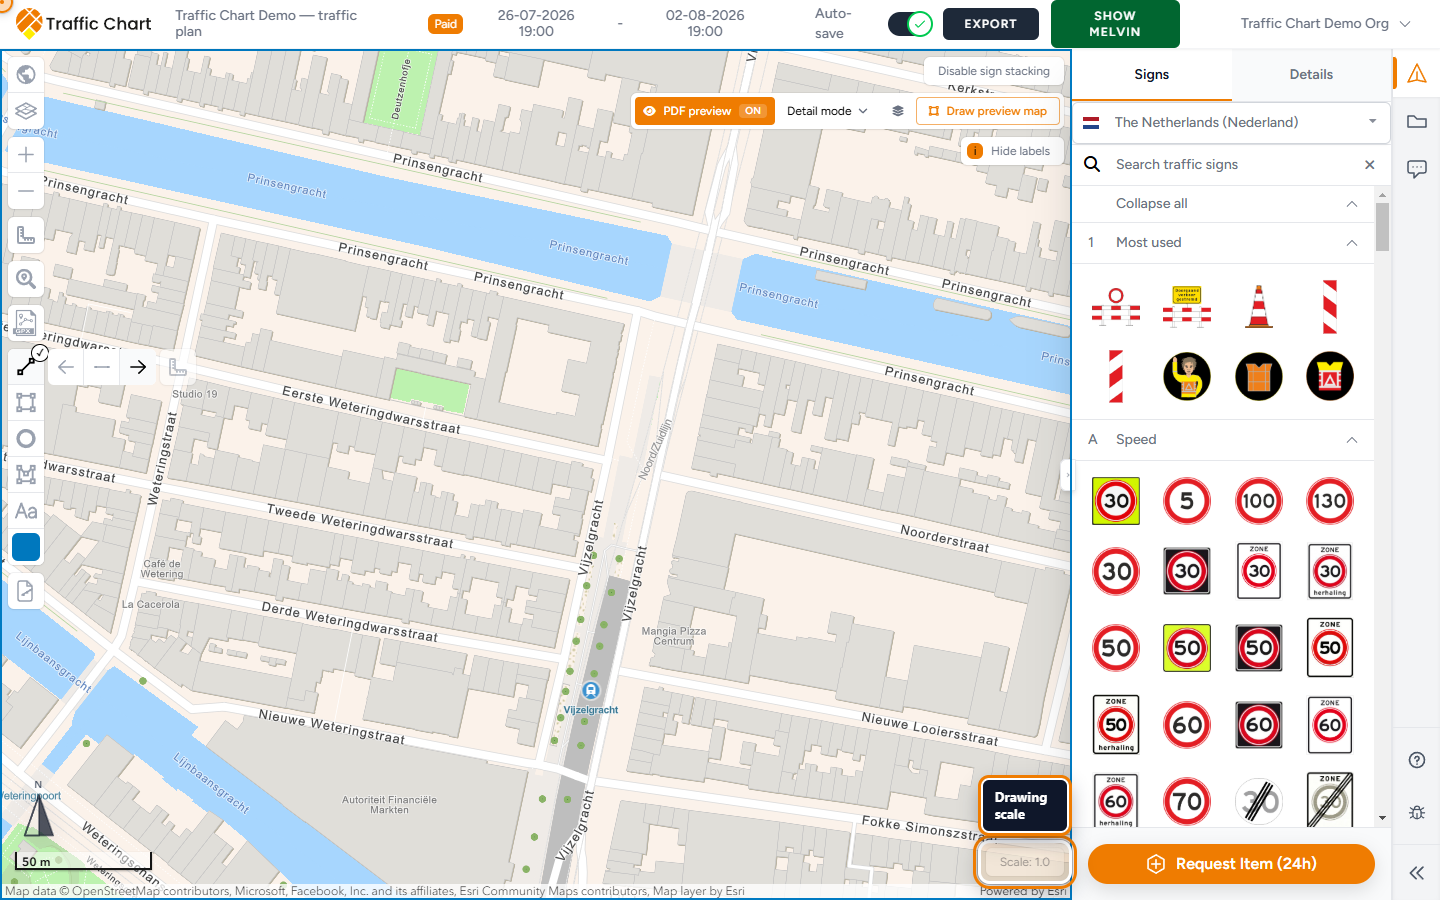
**Scale:** (bottom right) controls how large signs and drawings appear relative to the map. Default is **1.0**. Lower values shrink objects so more can fit on **Detail** export pages. The slider runs from 0.1 to 1.0.
Address search, zoom, and this slider together: [Search address, zoom, and Scale](/hc/test/articles/search-address-zoom-and-scale).
1. Click **Scale:** and move the slider.
2. If **Confirm scale change** appears, read it. Body: **To ensure optimal results with the new scale (0.5), your detail export maps will be reset and need to be redefined. The scale function gives you more control over the size of objects like lines and traffic signs.** (the number is the scale you picked).
3. Notes on that dialog: **Scale 1.0 is the default. If you lower the scale (e.g., to 0.5), all objects will shrink, and detail export maps must be redrawn. This helps keep traffic signs readable when exported or printed.** And: **PDF preview and XL maps will be kept because their scale is based on the selected export map.**
4. **Confirm** only if you accept redrawing those **Detail** rectangles. **Cancel** leaves the previous scale.
5. **Scale cannot be changed while PDF preview is on.** Turn **PDF preview** **Off** first. [PDF preview](/hc/test/articles/pdf-preview).
Prefer setting scale before you finalise many **Detail** maps. After a change, re-check export framing and sign size on PDF.
## Coordinates and address
Select a sign stack and open **Details**. **Coordinates** lists **Latitude** and **Longitude**. **Address** shows the reverse-geocoded street when the app has one.
Use **Search address** (**Type to search address**) to jump around. Use coordinates when someone asks for an exact point.
Sketches do not get an **Address** row. If you need a labelled point for a crew, place a sign or a traffic-controller post instead of only **Add text**.
## What prints
Sketches, GPX, and text notes print **only** on map pages, and **only** where they sit inside an export rectangle (**Detail** or **XL**). A detour line that stops just outside **Map 1** is missing from that page.
They do not appear on the **Materials list**. They do not appear on **Post orders**. A measurement **Total** never prints.
Draw the export map *after* the sketch, or redraw the rectangle so the sketch is inside it. [Export and print traffic plans](/hc/test/articles/export-and-print).
## What good looks like
Detour lines sit on the carriageway, not in gardens. Colours are consistent. GPX matches the intended route. **Scale:** is set before you draw lots of **Detail** maps. Measurements you needed for a decision are cleared so they do not clutter the screen. **Layers & Objects** can **Zoom to object** for every sketch you care about.
## If something blocks you
| Situation | What to try |
|-----------|-------------|
| Sketch tools missing | You are read-only, in **Export** mode, or not the assigned editor — [I can’t open or edit a plan](/hc/test/articles/cannot-edit-plan) |
| **Failed to import GPX file** | Simpler file, or **Add line** |
| **Scale:** greyed out | **PDF preview** **Off**. Tooltip: **Scale cannot be changed while PDF preview is on.** |
| Sketch missing on PDF | It sits outside the export rectangle — [Export and print traffic plans](/hc/test/articles/export-and-print) |
| **No objects found** | You have not drawn yet, or the layer is empty after a delete |
| **This layer is locked** | **Unlock layer** or **Unlock object** |
## Related articles
- [Tour of the traffic plan editor](/hc/test/articles/editor-tour)
- [Search address, zoom, and Scale](/hc/test/articles/search-address-zoom-and-scale)
- [Map layers and Melvin](/hc/test/articles/map-layers-and-melvin)
- [Working with signs](/hc/test/articles/working-with-signs)
- [Export and print traffic plans](/hc/test/articles/export-and-print)